Customize the fields of WTP order tickets with the Ticket Editor.
With the Ticket Editor you can:
Add
or delete fields
Rename
and resize fields
Move
and align fields
Save ticket layouts and apply them to any WTP ticket
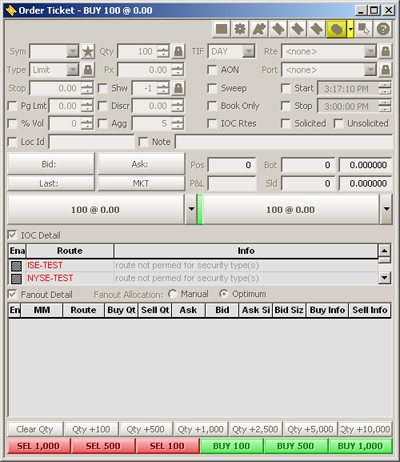
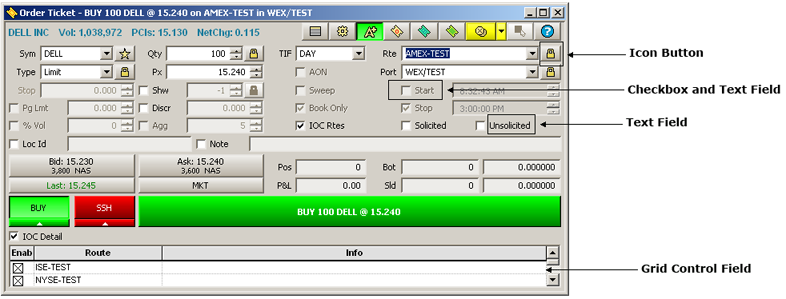
Using a few simple commands a standard ticket can be transformed into a customized ticket:
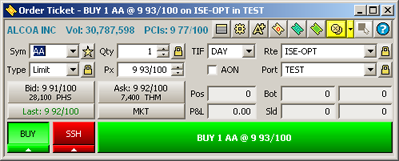
System Default Ticket
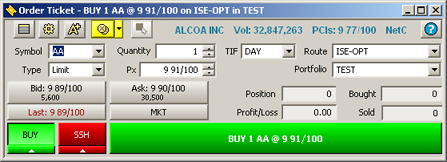
Customized Ticket
Place an Order Ticket in Edit Mode
An order ticket must first be placed in Edit mode for changes to be made.
For the Standard Order Ticket, Crossing Order Ticket, Report Trade Ticket, Adjust Position Ticket and Stage Ticket:
Right-click on the ticket and select Edit Ticket Layout.
For Order Tickets in Spread Ticket, Spread Builder, Equity Quote Cube, and Option Quote Cube:
Click on the ticket then select Edit Ticket Layout from the File menu.
Alternate Method:
Right-click on the ticket and select File Commands-->Edit Ticket Layout.
There are two methods to edit a text field.
Double-click on a text field. An Edit
Text window will display:
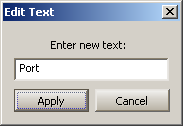
Enter the new text and select Apply.
Alternate Method:
Select a text field. A box will encircle the selected field. In the image below, the Port field has been selected for editing:
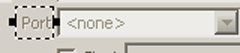
Right-click and select Edit... The Edit Text window will appear as above.
Once a field has been selected it can be moved by dragging it with the mouse or using the keyboard's arrow keys.
Every field can resized horizontally. Select a field and grab the left or right handles of the field and drag the mouse to the desired size.
Note 1: Icon fields and grid control fields can have their width and height resized.
Note 2: Though icon fields can be resized, the icons themselves cannot be changed.
A field can be deleted using the delete key or by right-clicking on the text field and selecting Delete.
Note: Any deleted field can be placed in an Order Ticket again using the Add Control feature.
Multiple fields can be selected. The fields can then be aligned, moved, or deleted.
Select multiple fields by holding down the ctrl key and click on each field to be manipulated.
Multiple selected fields can be aligned left, right, top, or bottom.
Select
the fields that are to be aligned.
Right-click and select Align --> Align left, Align right, Align top, or Align bottom.
In the first image below, four text fields have been selected.
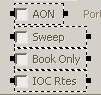
After selecting Align --> Align Right the fields are right-aligned:

Note 1: Text field alignment results in the fields being aligned, not the text within those fields. If it desirable to align the text, resize each text field so there is no space around the text, then issue an alignment left or right command.
Note 2: The align top command aligns the tops of all selected fields. The align bottom command aligns the bottoms of all the selected fields.
Add Controls to an Order Ticket
Controls (i.e., fields) can be added to order tickets.
In edit mode, right-click anywhere in an order ticket and select Add... The Add Control window lists controls by category:

Double-click on a control category (or click on the + symbol) to display the controls for the category.
The controls that are not currently on the order ticket are listed in boldface.
To add controls to an order ticket:
Double-click on a control
Alternate Methods:
Select
a control and press Add.
Select a control and drag it to the desired position on the order ticket.
Multiple controls can be selected with the ctrl key and placed in an order ticket. Controls will display in a cascading fashion as they are added to an order ticket.
Note 1: Any control that was previously deleted from an order ticket will be listed in boldface in the Add Control window and can be re-inserted.
Note 2: The list in the Add Controls dialogue contains every control from all tickets, not just the controls supported by the current ticket. Some controls are only supported on certain tickets.
Search for Control Names
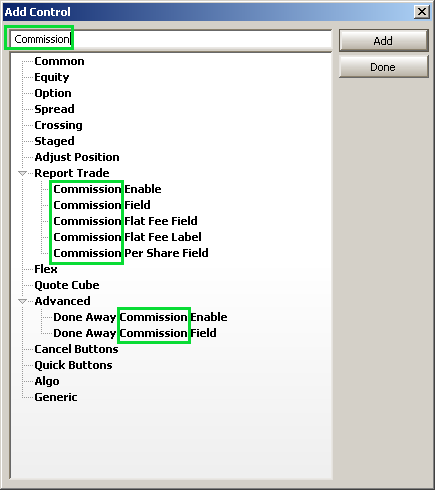
Search results are displayed on a character-by-character basis as each character is entered in the search field (see search field above). Also, search results are displayed within the control category in which they reside. In the example above, the word "Commission" is found under two control categories, "Report Trade" and "Advanced".
A ticket layout can be saved as a text file (.txt).
Save a ticket layout without exiting Edit mode:
Right-click on the order ticket and select
Save Layout As...
The Save Ticket Layout As...
window will display:

Enter the ticket name and press Browse.
A new window will open allowing you to select a desired location for
the layout file. Once the location has been selected, press Save on the Save
Ticket Layout As... window.
Note: If a ticket name is not entered before Browse
is selected, it can be named when a folder/drive is selected.
Alternate Method:
Enter the ticket name and press Save. The ticket layout will be saved in your system's default folder/drive.
Apply changes from Edit mode:
Right-click
on the order ticket and select Exit
Edit Mode. The Exit edit
mode confirmation window displays:
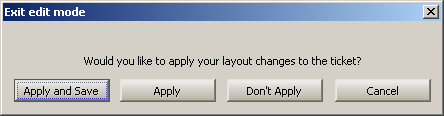
Select
one of the following:
Apply and Save—Exit
edit mode, apply all layout changes to the current ticket, and
save the ticket as the default
template.
Apply—Exit
edit mode, apply all layout changes to the current ticket, but
do not save it as the
default template.
Don't Apply—Exit
edit mode, do not save any layout
changes and do not modify the default template.
Cancel—Return
to edit mode without saving any changes.
Note:
If Apply was
selected, the edited ticket layout can still be saved as the
default template with the following command:
For the Standard Order Ticket, Crossing
Order Ticket, Report Trade Ticket, Adjust Position Ticket and
Stage Ticket:
Right-click on the ticket and select Save as Default Template.
For Order Tickets in Spread Ticket, Spread Builder, Equity Quote Cube, and Option Quote Cube:
Click on the ticket then select Save as Default Template from the File menu.
Alternate Method:
Right-click on the ticket and select File Commands-->Save as Default Template.
There are a couple of methods for loading a ticket layout, depending on the ticket being edited and whether the ticket is already in edit mode.
Load a Ticket Layout When Not in Edit Ticket Mode:
For the Standard Order Ticket, Crossing Order Ticket, Report Trade Ticket, Adjust Position Ticket and Stage Ticket:
Right-click on the ticket and select Load Ticket Layout.
For Order Tickets in Spread Ticket, Spread Builder, Equity Quote Cube, and Option Quote Cube:
Click on the ticket then select Load Ticket Layout from the File menu.
Alternate Method:
Right-click on the ticket and select File Commands-->Load Ticket Layout...
Load a Ticket Layout When in Edit Ticket Mode:
Right-click on an order ticket in edit mode and select Load Layout... The Load Ticket Layout... window displays:

If the path and order ticket name are known they can be entered in the text field. Press Load to load the ticket layout.
Otherwise, press the Browse key and select the file from the appropriate folder or drive.
Once a ticket layout file is selected, press the Load button.
Although it is recommended to edit a ticket layout using the ticket editor function, the ticket layout file can be manually edited in Notepad or other text editing programs.
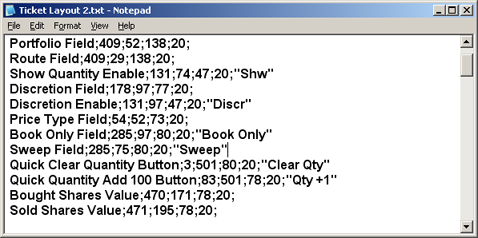
Each line in the ticket layout file contains (left to right):
Field name
X position
Y position
Width
Height
Display text (applies to labels, checkboxes, and radio buttons)
If a ticket layout was edited in a text editing program (as above), the order ticket will need to be refreshed in order to display your changes.
To refresh a ticket layout:
For the Standard Order Ticket, Crossing Order Ticket, Report Trade Ticket, Adjust Position Ticket and Stage Ticket:
Right-click on the ticket and select Refresh Ticket Layout.
For Order Tickets in Spread Ticket, Spread Builder, Equity Quote Cube, and Option Quote Cube:
Click on the ticket then select Refresh Ticket Layout from the File menu.
Alternate Method:
Right-click on the ticket and select File Commands-->Refresh Ticket Layout.
Note: The Refresh Ticket Layout command will only refresh the currently loaded layout.
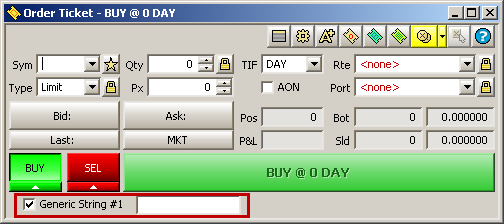
Add a Drop-Down List to an Order Ticket
Generic string controls can be added to the Order Ticket that result in a drop-down list of configurable values. These values are stored in a text file associated with the order ticket.
To add generic string controls with configurable values:
1. Add the controls Generic String # Enable and Generic String # Field to the Order Ticket:
2. Save the Order Ticket to a .txt file by right-clicking on the ticket and selecting Save Current Layout As...
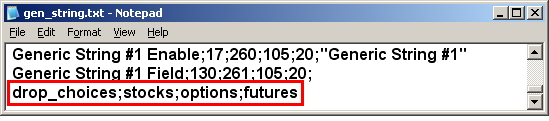
3. Open the .txt file and add the values that will appear in the drop-down list. The list of values must be proceeded with drop_choices;
Use the semi-colon as a delimiter between selections as seen below:
4.
Load the .txt file into the Order Ticket:
Launch the Order Ticket.
Right-click on the ticket and select Load Ticket Layout.
Select the .txt file that was previously saved.
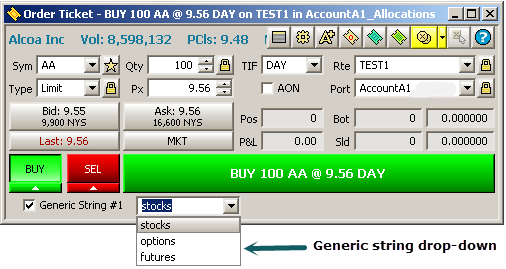
5. The Order Ticket will now feature the drop-down list.
6. The new ticket layout can be saved as the default template.
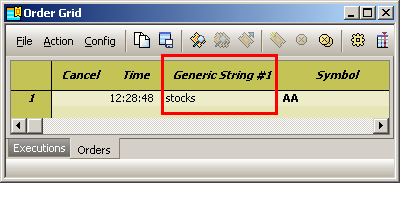
The Order Grid can be configured to display the generic value associated with an order. Add the Generic String column using the Field Chooser.
Revert to Default Ticket Layout
A customized ticket layout can be reverted to the default version of the ticket. The default ticket layout will be effective only until the ticket is closed. When an order ticket is re-launched, the ticket layout that was previously saved as the default will be loaded.
To revert
to the default ticket layout:
For the Standard Order Ticket, Crossing Order Ticket, Report Trade Ticket, Adjust Position Ticket and Stage Ticket:
Right-click on the ticket and select Revert to Default Ticket Layout.
For Order Tickets in Spread Ticket, Spread Builder, Equity Quote Cube, and Option Quote Cube:
Click on the ticket then select Revert to Default Ticket Layout from the File menu.
Alternate Method:
Right-click on the ticket and select File Commands-->Revert to Default Ticket Layout.
Revert to System Default Template
A ticket layout
saved as a default template can be reverted to the system
default version of the ticket. Once this occurs, the system
default ticket will be one that is displayed whenever an order ticket
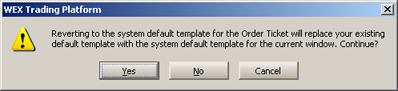
is launched. When issuing the Revert
to System Default Template command, a warning/confirmation
message displays:
To revert to the System Default Template:
For the Standard Order Ticket, Crossing Order Ticket, Report Trade Ticket, Adjust Position Ticket and Stage Ticket:
Right-click on
the ticket and select Revert
to System Default Template.
Select Yes to revert to the system default template.
For Order Tickets in Spread Ticket, Spread Builder, Equity Quote Cube, and Option Quote Cube:
Click on the
ticket and select Revert to System
Default Template from the File
menu.
Select Yes to revert to the system default template.
Alternate Method:
Right-click on
the ticket and select File Commands-->Revert
to System Default Template.
Select Yes to revert to the system default template.
© 2015 Wolverine Execution Services, LLC